Balsamic Glazed Chicken with Roasted Winter Roots


Sorry for the delay in posting, things are always a roller coaster in my life. Here is my most recent favorite, Balsamic glazed chicken! This recipe is so, so easy. I can't stress enough how perfect it is on a cold night in with the babe. The Chicken is Split or butterflied before Roasting giving it fast baking time as well as the option to cook either on the grill or in a crock pot as well. The vegetables, or winter roots, are roasted in the pan under the chicken, absorbing all the juicy goodness and making them perfectly seasoned and tender.


You will need;
1 6-7lb Split or Butterflied whole fresh Chicken*
1/2 cup Balsamic Vinegar
1/4 cup Olive Oil
3 tablespoons Herbs de Providence or any other Salt Free poultry seasoning**
3 teaspoons salt, divided
1 tablespoon fresh ground black pepper
1/4 stick of butter
6 sprigs fresh rosemary and thyme
1 whole lemon juiced and remains saved
1 1/2lbs Yukon gold potatoes, wedge sliced
1 white onion, thickly sliced
2 carrots, thickly sliced
1 head of garlic cut in half width wise
1 bulb of fennel, thickly sliced
1 teaspoon olive oil, reserved


Preheat oven to 400°F. in a bowl whisk together balsamic, olive oil, lemon juice, 2 of the teaspoons of salt, pepper and dried herbs to emulsify. Toss the potatoes, onion, lemons remains, carrots and fennel slices in the reserved teaspoon of olive oil. Scatter vegetables loosely in a large heavy bottom pan or steel lasagna pan. (i don't recommend a glass pan as the vegetables wont get crisp enough).Reserve 4 sprigs of both the rosemary and thyme. Chop remaining fresh herbs and in another bowl cream with butter and 1 teaspoon of salt. Place chicken, breast side up, on top of vegetables in pan. Massage chicken sensually with balsamic dressing mix and separate breast skin with fingers or spatula. Stuff between skin and breast meat butter mixture and again, massage chickens breasts. Make sure balsamic mixture covers all of chicken. Any remainder of balsamic sauce let pool under chicken onto vegetables. Wedge 4 each of the fresh sprigs of herbs in the chickens cavity on each side along with the garlic pieces.


Bake in oven at 400°F for 35 minutes and then drop the oven temperature to 350°F and continue to bake for 35 minutes. By the end of this hour if chicken does not seem crispy enough, put back in oven and broil for about 2-5 minutes. When done baking let rest in pan for 20 minutes before cutting to seal the juices in.

I served this bad boy with some lemon garlic green beans and my boyfriend was needless to say smitten with me and asking for thirds.The juices that remain in the pan are amazing. You can remove the chicken and vegetables to cool and place the pan back in under broil to thicken up the saucy goodness and serve it as a reduction over the chicken and vegetables!

Happy nomz


*Any butcher will split or butterfly your whole fresh chicken for free at most grocery stores
** I was out of this particular herb blend so in a pinch (har har) I used Perfect Pinch Original- No salt by McCormick.
Read more...

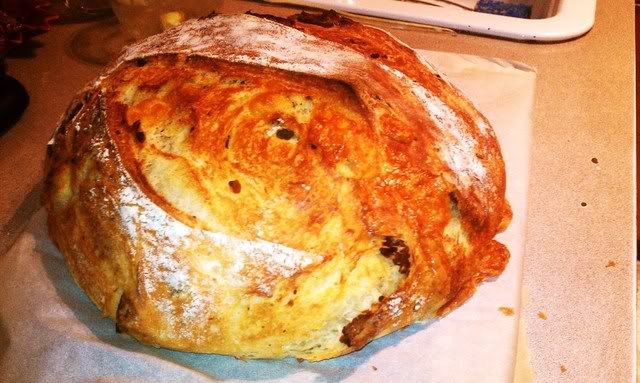
Potato and Green Onion Bread


Stoked! I haven't made bread in ages and this weekend I sat by myself in and empty house with a steady supply of Mai Tai's and Dexter, season 2. What better way to spend a day baking bread than that? This bread is pretty fantastic and I believe that if I were a lover of Jalapeno's they would make a harmonic connection in this recipe. I, however, am a pussy when it comes to spice and subbed them out.
adapted from Toxo's Bread; Ultimate Man Bread.


This recipe requires a wild yeast or synthetic yeast starter. Making one is easy but requires at least a day ahead of prep work.

Heavy Pinch active dry yeast
2/3 cup water, room temperature
1 cup + 3 tbsp unbleached bread flour

Start by adding the water and yeast to a medium sized bowl and stir gently until dissolved. Let the yeast "ferment" for a moment or two too become frothy. Then, slowly, add the flour and mix on the lowest stir setting possible until the mixture is fully incorporated and seems bubbly. Cover with plastic wrap and let sit over night in a warm, dry place for at least 24 hours, or double in size. This starter works really well the longer you let it sit. In order to keep it growing you can feed it every couple days with equal parts water and flour. This will keep the yeast "alive" by "feeding" it and will basically never go bad. ( if you take care of it...)

1 medium potatoe, coarsely chopped
potato water, lukewarm 3/4 cup
2 and 1/2 tbsp liquid sourdough starter
4 cups unbleached bread flour
2 tsp active dry yeast
1 1/2 tsp salt
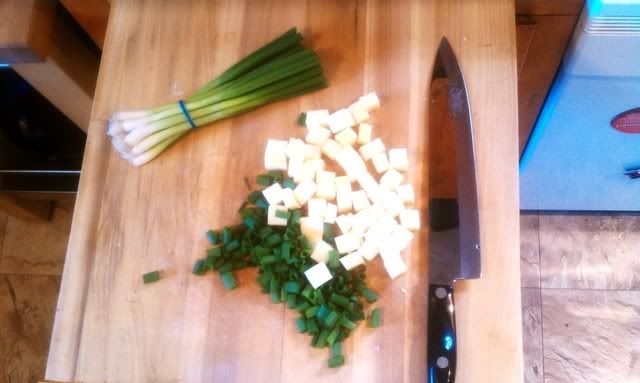
1/2 cup chopped green onions
1 tbsp minced garlic
2 cups 1/4th inch cubs of medium cheddar
6 slices thick-sliced bacon, coarsely chopped


Par-broil the potatoes until fork tender, drain, reserving the water. While potatoes are cooling, fry the bacon, half the green onions and the garlic until rendered and crispy. When cooked, move the bacon and the fat to a bowl, scraping the pan for any residue.

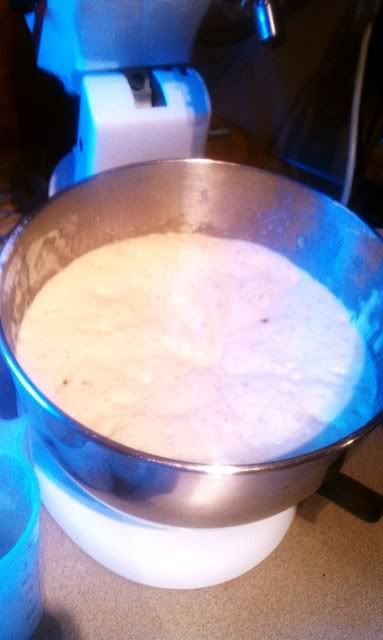
In a mixing bowl add the potatoes and mash lightly with the back of a fork. Do not completely mash, be sure to leave some chunks for the bread. This will add a great texture and creaminess to it. Add the starter and half the flour and mix until smooth. Let rest for 35 minutes.

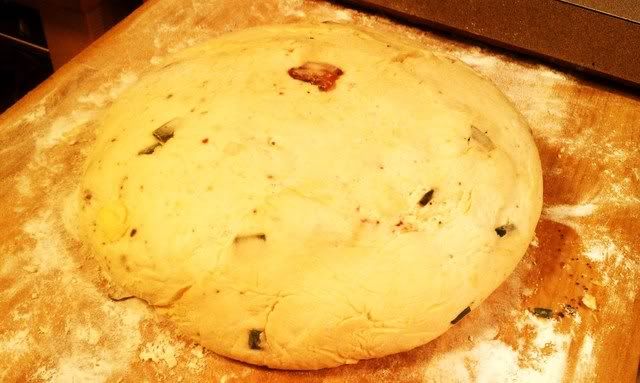
After the dough has rested you should notice it start to rise again and the surface become more smooth. Add the remaining flour, salt and potato water. Knead for 6-8 minutes being gentle not to smash the glutes in the bread too much. The dough will seem very sticky so be sure to flour your work surface and hand well. Around the end of your kneading, fold in the green onions, bacon, fat and cheese. Let rest now for 30 minutes, then re-knead / fold the ingredients and repeat 2 more times for a total resting period of 90 minutes.


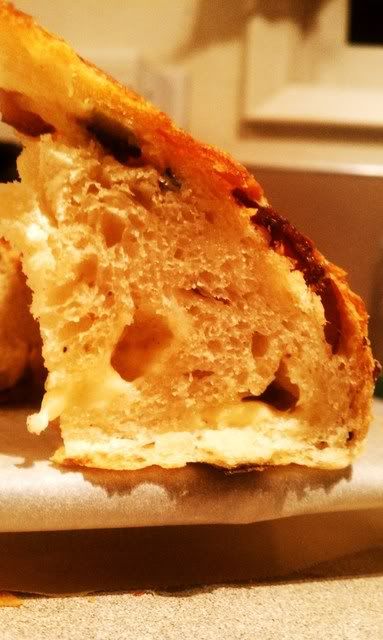
Divide the dough into two loafs and place on a parchment paper covered cookie tray. Let rest for a final fermentation of 60 minutes. While the dough is in its final resting, start by boiling 2 cups of water. Place the boiling hot water into a shallow tray on the bottom of the oven. When the dough is ready, place in a NON preheated oven at 500 degrees. When the oven has done preheating, turn down to 450 and cook for 35-45 minutes or until golden brown. You should rotate the bread halfway through cooking to ensure even shape and consistency. Let cool off in the oven with the door open for 45 minutes before slicing.

Read more...

Sierra Nevada Beer Cheese Soup


I haven't had a real working kitchen in many months, what with the shallow sink, small oven and about 5 square feet of walking space and counter space (hence my lack of posting. Sorry dudes!) Recently I had the opportunity to cook in a real functional working kitchen! It's been on and off rain or snow lately and I just really wanted some comforting hearty soup. I went to full sails brewery and had the most amazing porter cheddar soup and have been searching since October all over the internet for a replica. Unfortunately all that was available to me was Sierra Nevada's IPA, which isn't as dark or sweet as a porter. However, with proper care and cooking techniques the soup came out amazing and I didn't experience a strong bitter taste that usually accompany cooking with a beer so hoppy as an IPA.

1 larger white onion
2 tablespoons fresh chopped garlic
1 1/2 sticks butter
1/2 cup all-purpose flour
2 quarts milk
3 bay leaves
Sprig fresh thyme
3 cups shredded extra sharp cheddar
3 cups aged melting swiss
salt and pepper to taste
pinch of nutmeg
pinch brown sugar
1 1/2 cups dark ale (porter, stout, lager, etc)

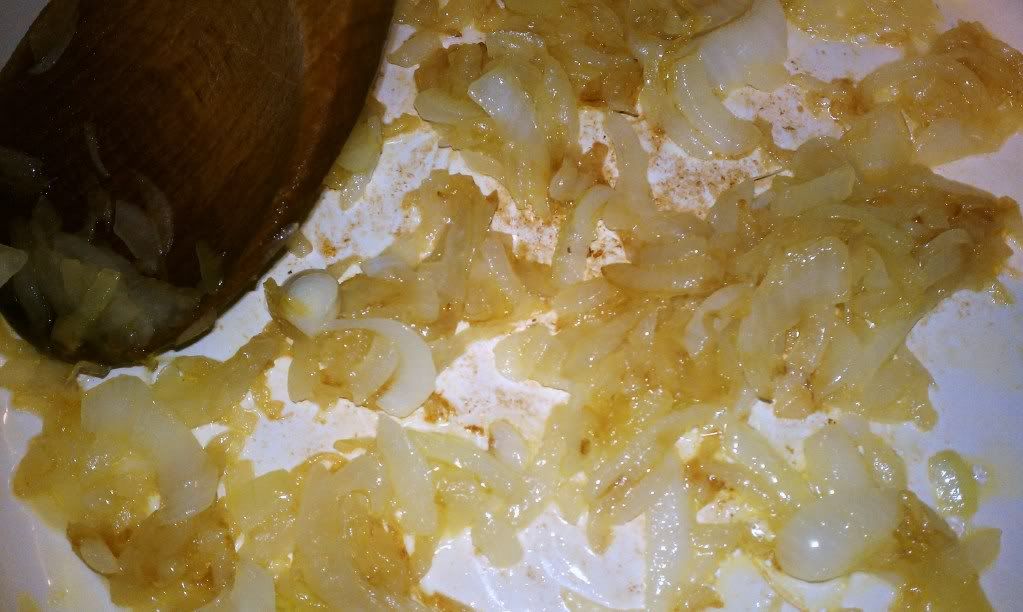
Stat by heating a heavy bottomed skillet capable of going the oven with a tablespoon of butter on medium low. Slice the onion as thin as possible, for this I used a cooking mandolin. Try to cut them evenly so they may cook evenly as well. Once the butter is melted start by sauteing the onion's until caramelized, about 40 minutes. This may seem like a pain but its so worth it. Make sure to keep stirring the onions so that they don't burn or brown too quickly and unevenly. If you need a little help you can sprinkle a bit of brown sugar over the onions to bring out the sweetness. Once the onions are completely translucent and golden all over, add the garlic and saute for about 3 more minutes or until the garlic becomes fragrant.

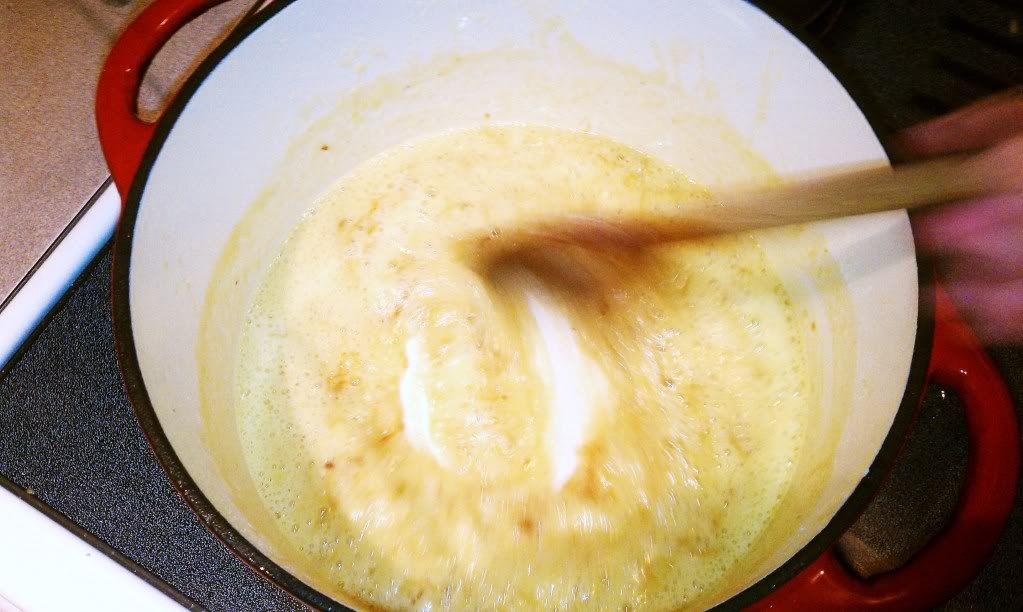
Now, add the flour; Cook, stirring frequently, over medium heat, about 15 minutes. This is the process of creating a Roux. Roux is a cooked mixture of flour and fat, traditionally clarified butter. It is the thickening agent of three of the mother sauces of classical French cooking. Butter, vegetable oils, or lard are commonly used fats. It is used as a thickener for gravy, other sauces, soups and stews. It is typically made from equal parts of flour and fat by weight. When used in Italian food, roux is traditionally equal parts of butter and flour. By contrast, Hungarian cuisine uses lard (in its rendered form) or - more recently - vegetable oil instead of butter for the preparation of roux (which is called rántás in Hungarian). You want to be careful to not burn this Roux, as its extremely delicate under high heat temperature. You want to keep stirring until it has lost its chalky consistency and taste, to keep your soup/sauce from getting gritty or tasting too much like flour.


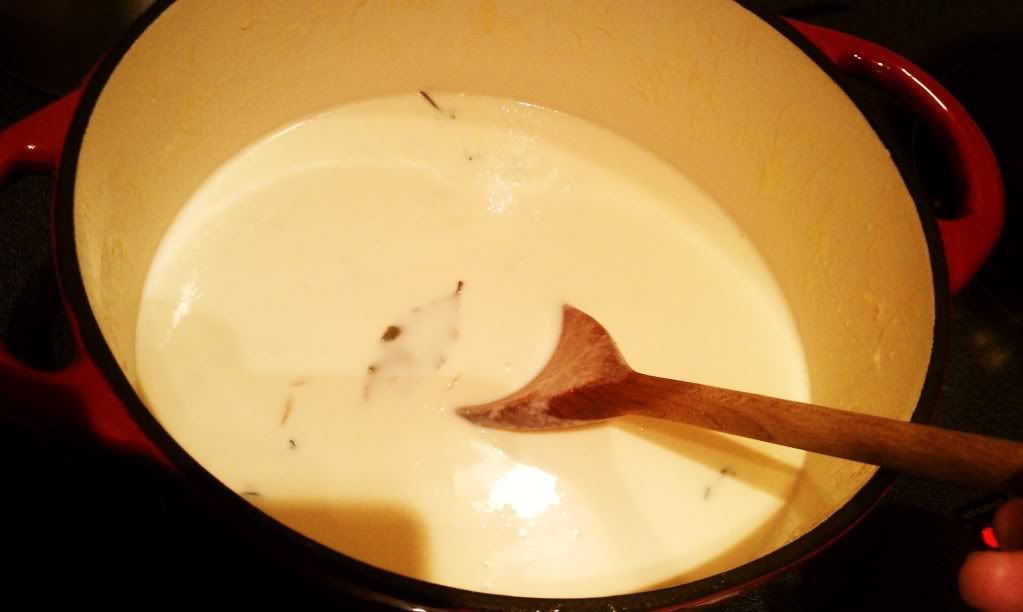
Slowly whisk in the milk, little by little at a time. Add bay leaves and sprig of thyme; Cook stirring constantly now, over low heat until the mixture completely coheres and thickens, about 15 - 20 minutes. Remove the bay leaf's and thyme sprigs from the pot. If any leaf's are still clinging to the thyme sprigs, scrap them off into the soup.


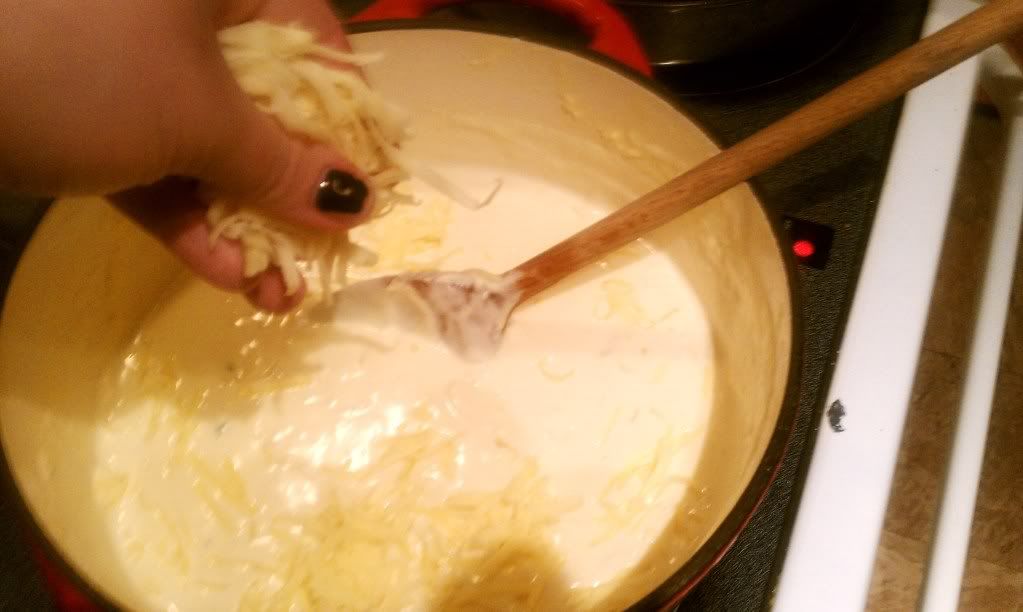
Stir in the cheese gradually; Cook just until the cheese melts. Stir in small handfuls at a time, one cheese at a time. Remove from heat and season with salt, pepper and nutmeg to taste. Lastly, just before serving, Stir in the beer. Only do this last step directly before serving the soup or the beer will become flat and bitter.


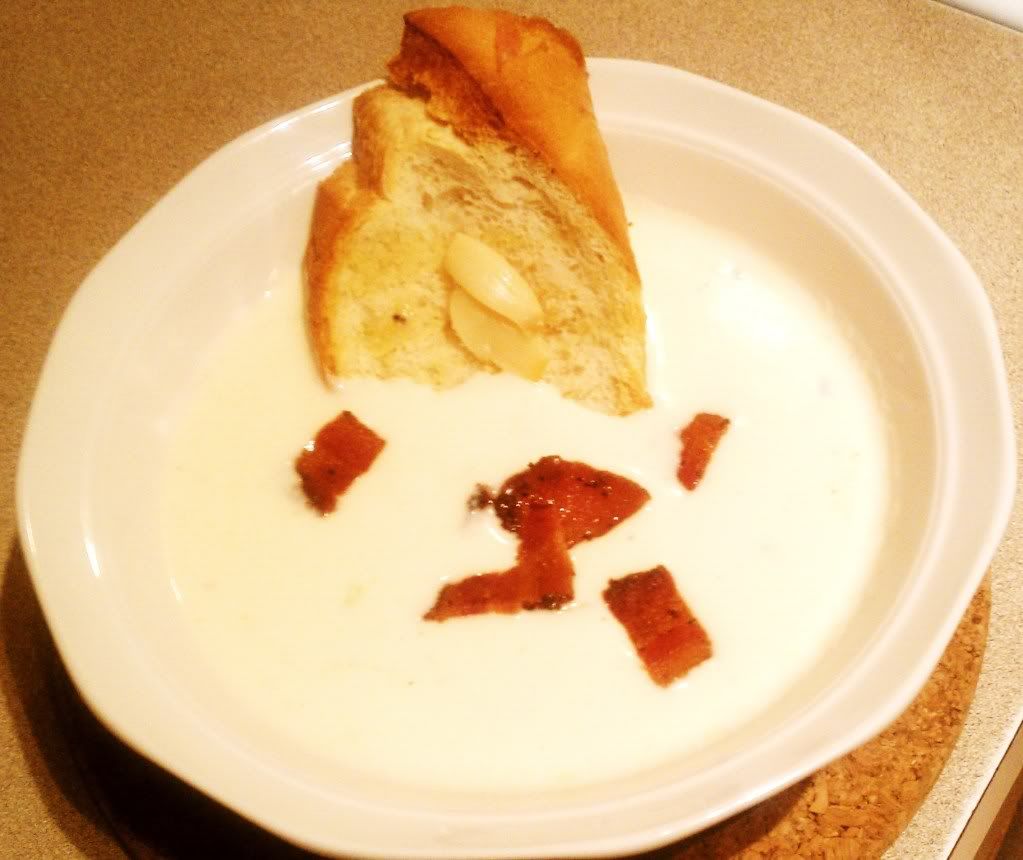
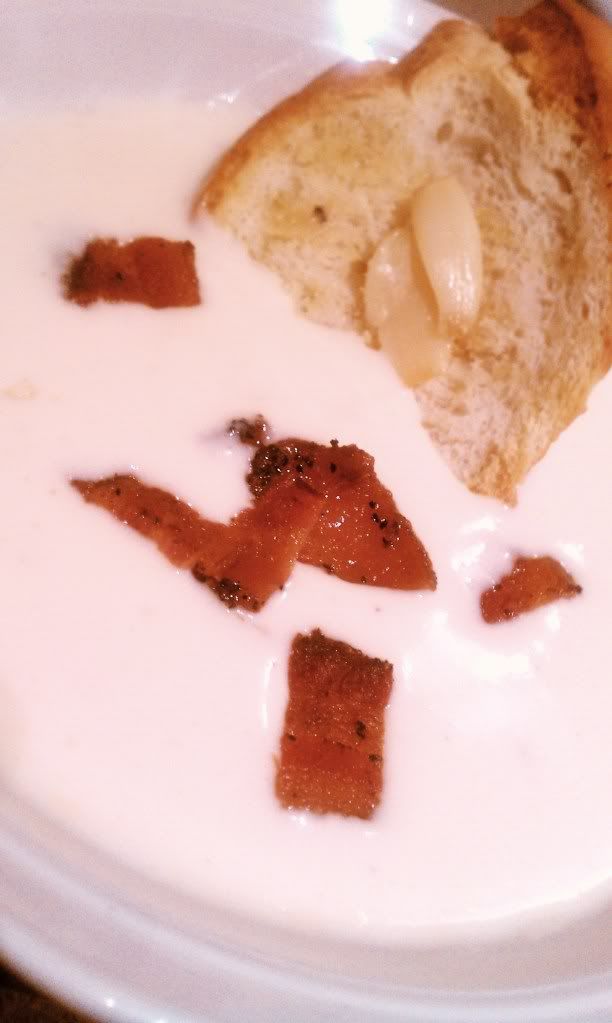
There are many ways to serve this soup, either it be with spiced popcorn, smoked sausages, peppered bacon, tempura fried broccoli or roasted garlic crostini's. I choose Roasted garlic french bread with crumbled peppered bacon! Hah!

Read more...

Review; Pine state Biscuits


school has really taken toll on my personal life lately and I haven't been in my kitchen for more than five minutes at any given time. Today was my first day off in two weeks so I decided to have a wellness day and venture out for something heavy, rich and greasy ( ya know, what I always talk about. ) It was about 11:40 am on a Sunday and I knew anywhere I went would be disastrous with all the post party's on a hunger prowl, so I was ready for a challenge and a wait. Pine state its awesomely delicious but I had never had the opportunity to indulge in there staple famous dishes, just the usual biscuits and gravy when I was a poor art student and lived 10 blocks away. TWICE now my boyfriend and I had tried to eat there sense we moved in together and due to there odd hours the line has either circled the block or they were closed all together. Today it was raining and though it was a little crowded inside, we were in luck! We scored a table in the first 8 minutes and our order had been places.


two home-style chocolate milks and two "Egg Reggie's".
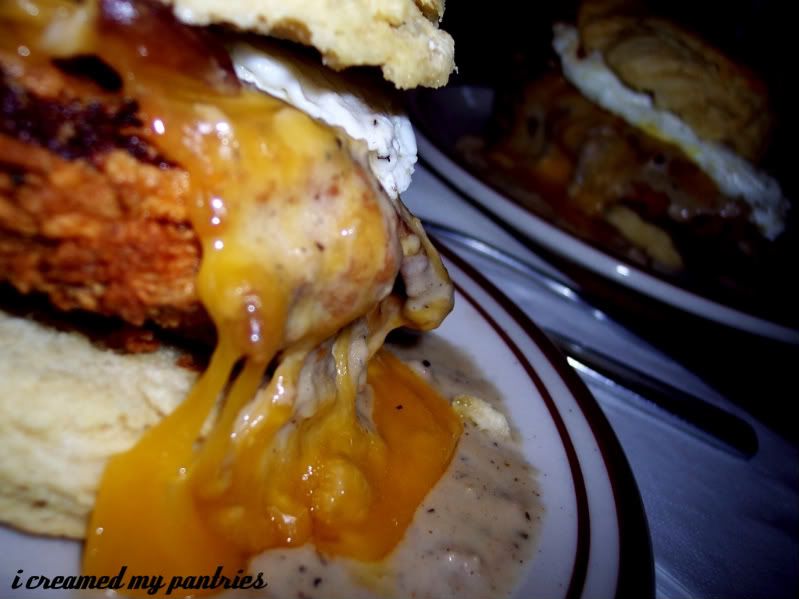
The Reggie seemed to be the headlining act with nearly everyone ordering it. A biscuit sandwich stuffed with a buttermilk fried chicken breast, eggs over easy, tillamook cheese slice, two slices of bacon and smothered in home-style gravy. Say whaaaat? It's counterpart "The Reggie" was the same thing, sub the egg.

The place is very cute, though I still think lacking in some seating, and filled with happy warm smiling employees. You buss and seat yourself, which is all fine, if white folk didn't always monopolize everything. Anyways, my morning was starting out cheerful with modest mouse blaring and fried chicken before me. Everyone walked away happy and good conversation was floating around the place.

I only recommend getting there not on brunch rush hours on a weekend, preferably later, like 1:30. They are up and running from 7am to 2pm daily and I have always had good luck on a Wednesday, my work and school schedule just never permits it.

I would definitely give this place 4 stars. The extra star I'm on the fence about because of there seating and with a place with that much foot traffic coming in I feel like they should invest soon in a better location.


PINE STATE BISCUITS; 3640 SE Belmont Street Portland, OR 97214 (503) 236-3346

Read more...

three cheese bacon and cherry tomatoes quiche


yummmyyy. Since I was a little girl I remember my mother or my grandmother sometimes making quiche and within minutes the entire pie was devoured. I have always held a huge place in my heart for cheese, specifically aged nutty and earthy cheeses, and this warm homey and comforting dish always makes me feel like a happy chubby little kid again. When great cheese is combined with other great corresponding ingredients, it creates a melody in my tummy that has me singing :3

This is a very flexible recipe, as you can change out the ingredients with basically whatever you want, so long as it keeps the theme to the cheese. I just got some really nice green onions, garlic heads, dry rub baccon and cherry tomatoes from whole foods, So I went with that.
Filling:
4 strips of baccon, cooked, dried and coarsely chopped
2/3 cup of halved cherry tomatoes
1/4 cup chopped green onions
2 cloves of garlic, finely sliced
1/3 cup grated fresh Gruyere
1/3 cup grated Grana Padano
1/3 cup grated white aged cheddar
3 eggs, whisked
1/2 tablespoon salt
pepper to taste
pinch of nutmeg
1 and 1/3 cup of milk or heavy cream


Flaky Crust:
Crusts are very hard to remain true to there name and not be dense soggy disks. Though the instructions are long, this Crust recipe will be a staple for your kitchen and you will greatly thank me, and the joy of cooking 79' edition, for introducing it. This recipe can't be cut in half, though it is enough dough for two pies. If wrapped in plastic wrap it will keep for 3-5 days, refrigerated.

2 and 1/2 cups all purpose flour
1 tablespoon powdered sugar
1 teaspoon salt
1 cup solid vegetable shortening
1/3 cup ice cold water
1 tablespoon butter for later

Start by making your crust, as it will have to chill for 30 min at least before baking. In a large bowl whisk together the flour, powdered sugar and salt. Take your vegetable shortening and carefully CUT it into the flour. This is very important so that you don't end up with a big greasy lump of dough.

If you have a pastry blender- use it, if not, use two butter-knifes and cut the dough in opposite directions until the shortening has been covered by the flour and made a fine grainy sand appearance with pea size lumps. The pea sized lumps of shortening will melt when the dough is baking, leaving pockets of steam to crisp and flake the dough from within.

Drizzle the water over the dough and cut in into the dough again with the knife technique. Do this until the dough easily sticks together, but is not so moist as it sticks to your hands. Divide in half and pat the dough into flat disks, cover in plastic wrap, and chill for 30 min or until you need to use it again.

Now, start working on the fillings for your quiche. In a bowl whisk together the eggs, milk, salt, pepper and nutmeg. If you haven't cooked your baccon yet, do it. Just stick those bad boys on an oven tray and bake for about 15 min at 400 degrees. This is my sneaky way of speeding up the ovens preheating time. If you haven't prepped your cheeses or other ingredients, now is the perfect time while that dough takes a break in the cooler. I like to sprinkle a tablespoon of flour on my grated cheeses before baking them so that they don't clump together (plus its a great "binding" agent).

By now the dough should be cool and you should have everything you need ready to just pop in the pan. Roll out your dough. If your not an expert baker, flour your workspace generously as well as your hands and rolling pin. You want your dough nice and thin and in a round circle shape. Lean when rolling, don't press. You want your dough fluffy and flakey, not hard and dense.

When the dough is about 1/8 of an inch thick, transfer to a pie pan or 9 by 9" cake pan and press in all sides. If there is extra hanging off the side, cut it off. You can re-roll out the extra and braid it to make a fancy crust, or just toss it like I did. Use that last tablespoon of butter as a sealant on the crust now by brushing it on. This will keep the eggs from soaking in while it bakes.
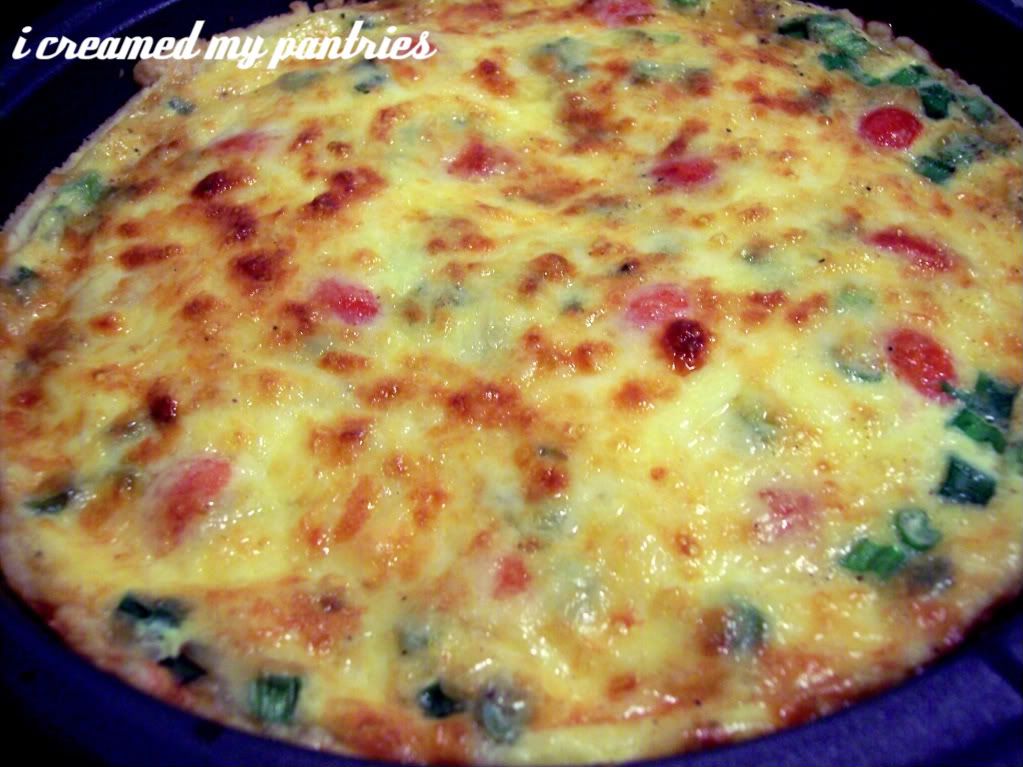
Lay your baccon evenly in your pie pan and in a circular design, lay out your tomato halves and green onions. this assures a bite of everything in each piece.

Finally, spread half your cheeses in and pour in your custard egg mixture. Us remaining cheese to top, and bake at 375 degrees for 20 - 30 min, or when cheese is bubbly and golden on top and custard is set. Let the quiche rest for at least 10 min so its internal temperature can rise, fluffing the egg.


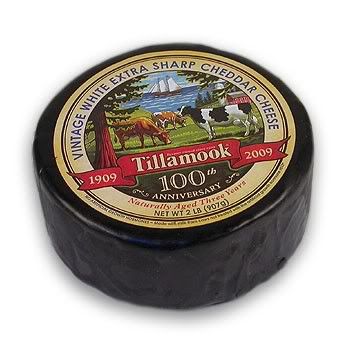
* A fresh gruyer is usually very easy to find at most food markets like fred meyer, safeway, ect. A Grana Padano is just an ittalian an all-purpose grating and cooking cheese with rich, sharp flavor, something you may need to ask for and is usually only available at stores with a specific gourmet cheese section. The white aged cheddar is also a very common cheese now; Tillamook has a great vintage white that's fairly cheap per pound, about 4$ or so, but it only comes in 2 pound loafs.

Read more...

totoro cookies


Me and my boyfriend came home from disneyland yesterday and had started talking about how cute it would be to make some sugar cookies that kept up that feeling we got while walking around the park. At first we struggled with ideas on what we would want to make. Alice in wonderland and pirates of the Caribbean cookies are fine and all, but we wanted something that would be so cute that when you looked at it you just wanted to punch it. Anyways, we settled on some kawaii totoro cookies with umbrellas and soot sprites.


they where much more simple than I had imagened to make, but I found myself stressing over keeping my lines straight and not spreading the frosting too far. They came out okay for a first REAL designed sugar cookie attempt, but next time I will definetly do some things different.

My tips for shaping the cookies are;

  • cool the dough for at least an hour before you do anything serious with it.
  • Roll it out as evenly as possible. 1/8 of an inch thick is a pretty good size.
  • If you arn't using parts of the dough, Refrigerate it!
  • To make your own shapes, start by drawing your design on a piece of paper, then cut out that design leaving about 1/10th of an inch of space around it. On chilled flat dough, lay your design not pressing too hard, and cut out with a sharp serrated knife around it. Transfer to a baking sheet using a spatula so it doesn't loose shape. If you find your cookies are sticking and hard to transfer, roll your dough out on parchment paper instead so you can just skip the spatula part and bake.
  • Smooth out doughs edges with a moist finger.
  • If your designs are bigger than 4inch, check on them after 15 min of baking, then again every 5 minutes. Take out of oven just before edges start to brown, or when the dough is slightly firm to touch.

Here is the recipe I used for the icing and cookies.

Read more...

German Chocolate Brownie Mouse Cakes

Brownie One Person cakes with chocolate mouse and vanilla butter-cream frosting. Happy birthday skye!


Brownie Mix:
8- 1 ounce squares of unsweetened chocolate
1 cup butter
5 eggs
3 cups sugar
1 tablespoon vanilla
1-1/2 cups flour
1 teaspoon salt

Preheat oven to 350. Grease a cupcake tin. In a bowl combine the dry ingredients and mix until blended. In a separate bowl mix the wet ingredients. Incorporate together until smooth, about 2 - 3 minutes. Pour into cupcake tins and bake for 15 - 20 min. Check them so they don't get to hard and crunchy. There ready just when a toothpick goes in and comes out clean. Save for later and let cool.

Use chocolate mouse recipe from before. Let cool in fridge.

For Butter-cream frosting
1/2 cup of butter, room temperature
4 cups powdered sugar
1 tbsp vanilla extract
1/2 tablespoon warm water
1 egg white

mix all the ingredients in a bowl on medium high until smooth. Let sit in fridge for 30 min - an hour.

To assemble the holiest of unholy;
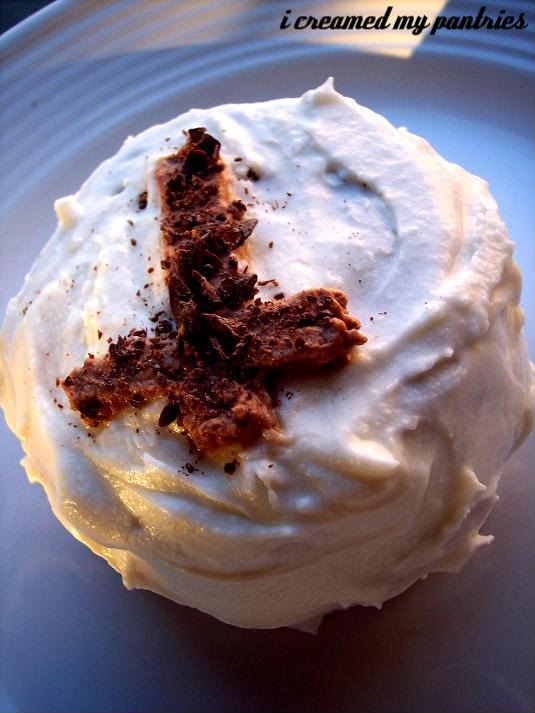
cut brownie cup cakes in half, hamburger way ( horizontal ). Fill with chocolate mouse and put back together, saving a little for decorating designs. Let them all sit for 30 min in the freezer. Take out and frost! Decorate with chocolate mouse using a tooth pick.

Read more...

Sugar Cookies


I have never been a baker. It takes timing, knowledge, patience and creative problem solving on the spot with a gentle hand. I always over work dough, over flour and burn. So when I decided I would attempt to make a cookie as a gift for Christmas, I was a little scared at the outcome. Being an explorer at heart I figured " what the fuck" and went with a classic. The sugar cookie. I knew only one person could tell me truly how to do it best...

I used Martha Stewart's Recipe, Ideal Sugar Cookies.
Martha has always been my hero, despite what some people say about her. Now I know she is a stuck up bitch, but she is a Boss Bitch and she knows how to bake. Hell, straight out of jail she was back on t.v making 'green brownies' with the rap icon Snoop Dogg. If that isn't keeping it real, I don't know what is.


Anyways, My cookies came out perfect, 15 min on the dot they were golden. You can cut them into any shape or size and it makes about 2 dozen 4inch sized cut out cookies. I went with circles and oh's because there easy. The frosting I decided I would do classic Royal Icing, which I found out by experience does NOT taste as good as it looks. I didn't research the fact that this icing tasted similar to soap, more so as I saw the words "glossy" and "royal".

Royal Icing Mix
2 large egg whites
2 teaspoons fresh lemon juice
3 1/2 cups confectioners (powdered) sugar, sifted

1/2 teaspoon vanilla extract
food dye for color, optional

In a mixer or hand mixer blend together the egg whites, lemon juice and vanilla on low until blended. Slowly, cup at a time, add in the sugar turning up your mixer to medium low. Do not blend to fast or you will end up with dense whipped cream. Finally, add in the food dye. Use immediately as the icing will begin to harden when exposed to air ( giving it a glossy finish )
Stuff in a pastry bag and your ready to go!

Note: never will I again attempt to make a pastry bag out of parchment paper from scratch. It is the work of satan and far more frustrating than worth the end results. Hail to whoever designed pre made resuable pastry bags.

Read more...

ultimate grilled cheese!

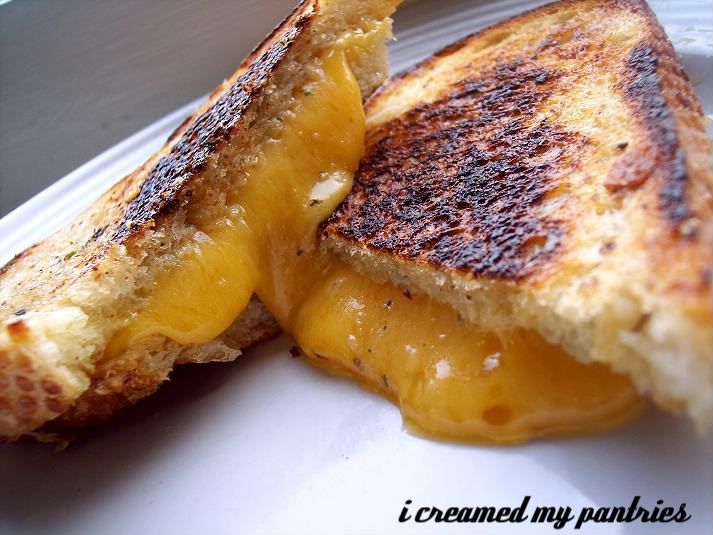
Remember that fancy pesto walnut mayo spread? I didn't lie when I said it would make the ultimate grilled cheese. Okay so this is probably abusing the fact that I said walnuts are healthy by suffocating them in extra sharp cheddar cheese but...
look at that ^
holy shit! isn't that tasty!?


2 slices of crunchy bread like sourdough, french or ciabatta
About 1/4 cup cheese or 2 slices of any good aged cheese. I used extra sharp cheddar
2 tbsp Fancy Pants Mayo
Dried Parsley and Paprika for garnish
Nonstick cooking spray

Try Also: Sliced Tomato, Sprouts, Spinach, Avocado or Red Onions.
And Vegans, If you have found a soy/almond or "cheez" spread you love, sub it!

Spray your pan with nonstick cooking spray just enough to make it slick. Take your bread and on the inside of one piece spread out the Fancy Pants Mayo. Add whatever garnishes or veggies you like, Tomatoes and fresh basil would really make this grilled cheese but I was out. On your cool pan layer the bread, garnishes, cheese and anything else, sandwich style. Grill one side on high heat for about 2 min until golden, then flip and turn down to medium low and grill for about 6 min until cheese is goey and melted. Cut and serve! Pair with a side of tomato soup!

Read more...

double chocolate Mouse With Mint Whipped Cream


So, sense I got my kitchenaid mixer early, I obviously just HAD to use it. To see if it worked... Anyways, it's probably the most beautiful piece of equipment my peasant hands will ever have the grace of using and I fucking love it. Whipped cream fluffed up in seconds with high airy peaks, Cookie dough batter perfectly incorporated and creamed butter the most velvety I have ever seen. <33 style="font-size:130%;">Chocolate Mouse:
4oz extra dark bittersweet chocolate
1 cup heavy whipping cream
2 tbsp granulated sugar
1 tsp vanilla extract
2 tbsp butter, chopped
3 eggs, without the yolks (yellow stuff)


Start by adding your cream to a medium sized bowl and using an electric mixer, fluff up on high speed rotating slightly until soft peaks start to form. ( Meaning you could stick a spoon in it and when you pulled the spoon out there would be a little peak in it. ) Move the whipped cream to the fridge and chill.

Now cut up your dark chocolate into fine little strips. Get your double boiler going. You want the pan on the bottom to only have a couple inches of water in it and to be at a low simmer. The water should NEVER touch the top pan, even when bubbling. In double boiler top melt the butter and chocolate stirring constantly and gently until melted. Add vanilla extract. Once the chocolate has melted dip your pinky in it and place some on your bottom lip. It should feel warm, but not too cold or too hot. If its not warm to the point where you really feel it, continue to melt. If its hot, take it off the burner and let it cool for about 10 min.

in another small bowl ( I know, a lot of dishes ) use your electric mixer to fluff up your egg whites until they start to get frothy. Add sugar and fluff up again. Your chocolate should be cool by now. Take your egg whites and mix them in to your hot chocolate a little bit at a time, stirring so the eggs don't cook. Your chocolate should get a little glossy and thicker. Take your whipped cream and ad a quarter of the chocolate to it, FOLDING, not stirring, gently until incorporated. Do this until completely mixed. Your mouse should be light and fluffy, if you stir it too much it will get thick, dense and heavy. Put it back in the fridge and let it cool for 1 hour or overnight.

Sweet Mint Whipped Cream:
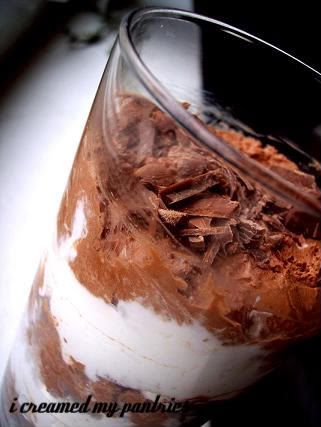
I layered my mouse with this because I felt that it needed something to make the dish brighter and feel lighter. The mint goes great with the dark chocolate and makes the entire dish feel... happy :]

1 cup heavy cream
1/4 cup sugar
1 tsp mint extract
1 tsp vanilla extract

Just like before, in a medium bowl ( i don't recommend trying it in a small bowl, I learned that the hard way ) fluff up your heavy cream until high peaks start to form, about 3 - 4 min depending on the strength of your mixer. Once the consistency of whipped cream forms, add both extracts and mix again. Now, with your mixer turned down to medium high, slowly add in the sugar so as not to clump. Tada! Light, fluffy, sweet and minty homemade whipped cream!

Read more...